How to Calibrate
Download App
You can download the latest version of the app from our website.
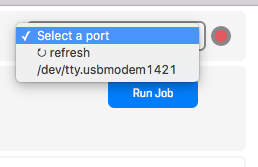
Connect to Robot
Make sure your robot is turned on, and your laptop is connected via USB cable.
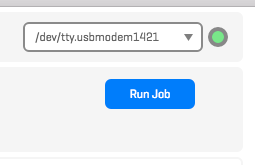
Go to the select port drop down, and refresh if no ports are shown. Once the port shows up, click it and the robot will jog up and down.
Important
Every time you connect to the robot, you need to home all axes before doing anything else.
Note
Linux users will need to get permission to open the robot’s serial port. This requires sudo privileges. In a terminal window, run the following command
sudo usermod -a -G dialout USER_NAME_HERE
Where USER_NAME_HERE is the name of account that will be running the App.
Finally, logout and log back in as the user to activate the change.
Upload Protocol
Your
.py
protocol file can load into the App, through either clicking
the “Upload” button, or drag-and-drop the
.py
file over that same button.
Note
Make sure that when saving a protocol file, it ends with the
.py
file extension. This will ensure the App and other programs
are able to properly read it.
For example,
my_protocol_file.py
If successfully loaded, your Python protocol will be simulated in the background to detect any errors. While this is happening, you will see the word “Upload” replaced by the word “Processing”. Once finished, the App will fill the calibration section of the App with your containers and pipettes.
Jogging
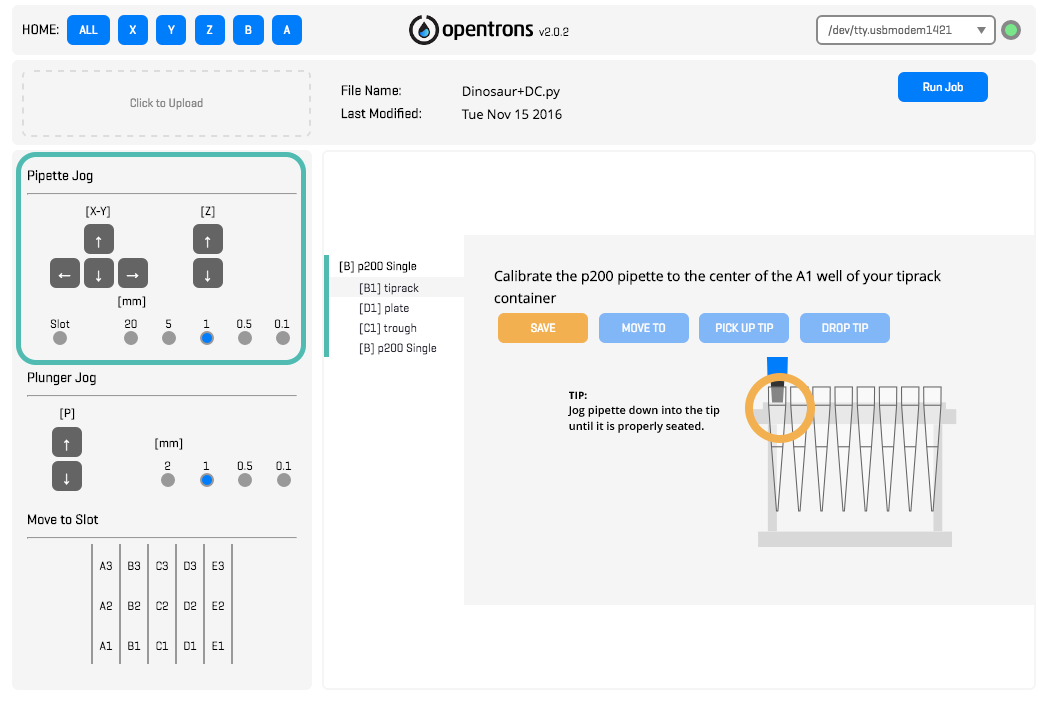
Slot Button
The slot button moves exactly one slot over in either X or Y, depending on which arrow you choose. This is particularly useful when calibrating multiple containers of the same type (eg an entire deck of 96 well plates). There is no slot Z, the robot will just move 1 mm.
AB Plungers
Use the plunger jog to move the plunger up and down. If you have selected a container or the pipette for the B axis, then the B axis will move, and if you have selected a container or the pipette for the A axis, it will move.
The app automatically toggles between pipettes (unlike 1.2)
Move to Slot
Jump to any slot on the deck with the Move to Slot buttons. The deck will automatically react and change between a 3x5 layout and a 2x5 layout based on which robot you are connected to (Hood vs. Pro/Standard)
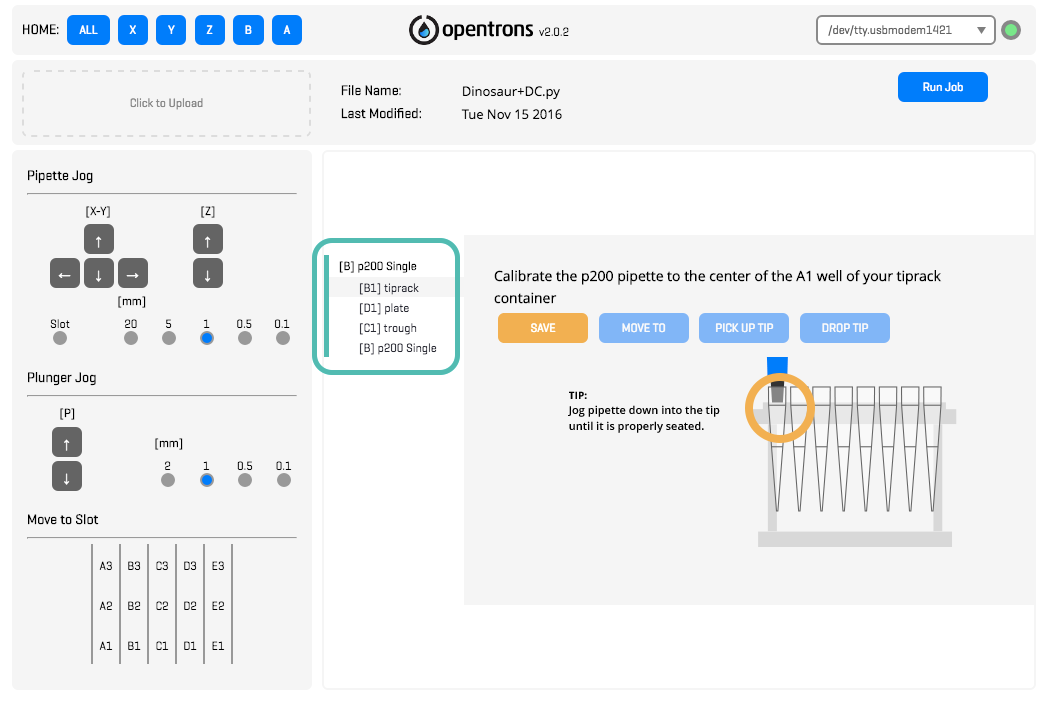
Calibrate
Once each container or pipette is calibrated, a check mark will appear next to it in the container list.
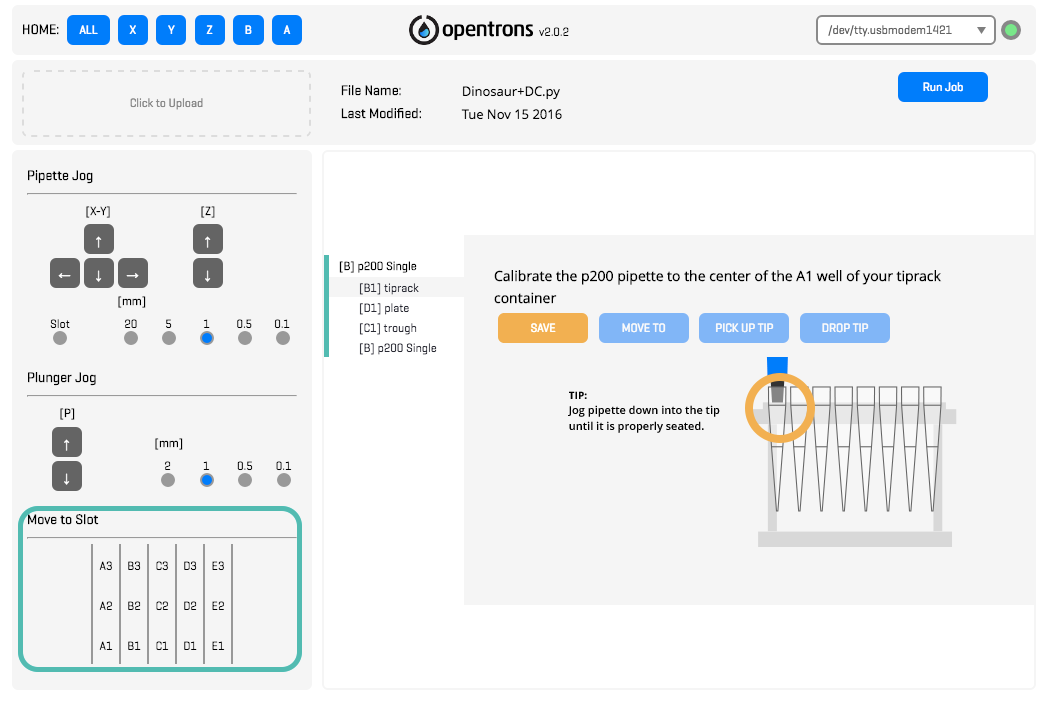
Tipracks
Jog the pipette down into the first tip in the tip rack. It should be firmly pushed into the tip, and the pick up tip button can be used to test its seating.
Calling the pick up tip button from anywhere on the deck will direct the robot back to the tiprack to pick up a tip. Drop tip will send the tip to the trash.
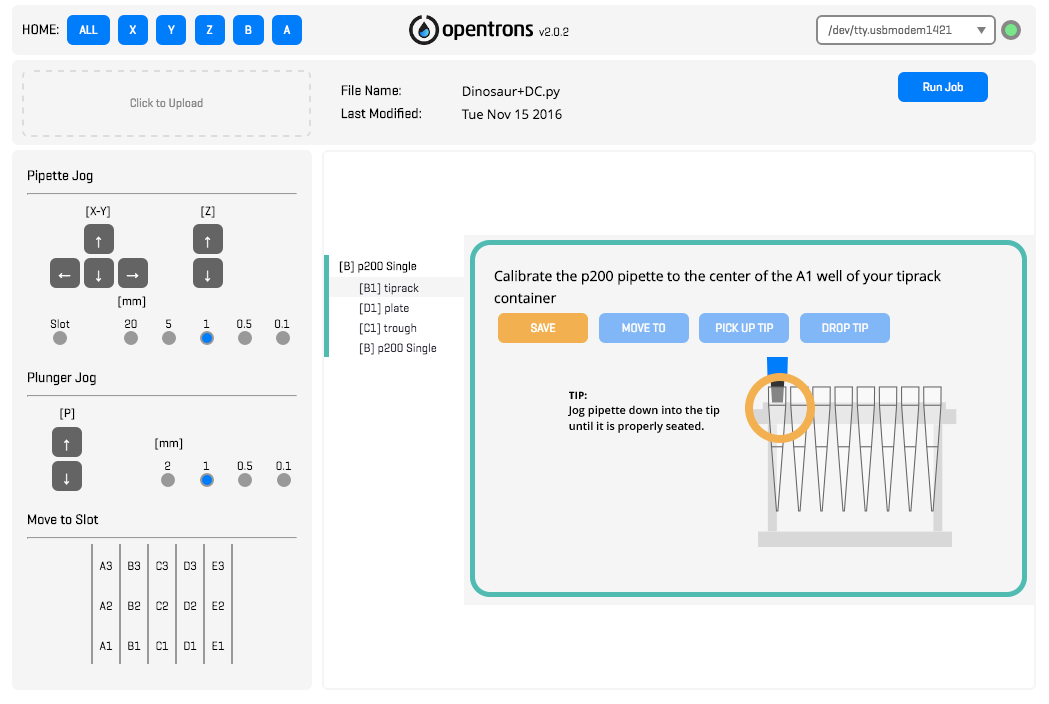
Containers
With a tip on the pipette, calibrate to the bottom of the first well or tube in the container. Use the diagrams in the app to guide calibration.
Pipettes
Four calibrations positions need to be set for each pipette: Top, Bottom, Blow Out and Drop Tip. Make sure your pipette is manually set to its highest volume (or ~5 uL higher) for accurate calibration.
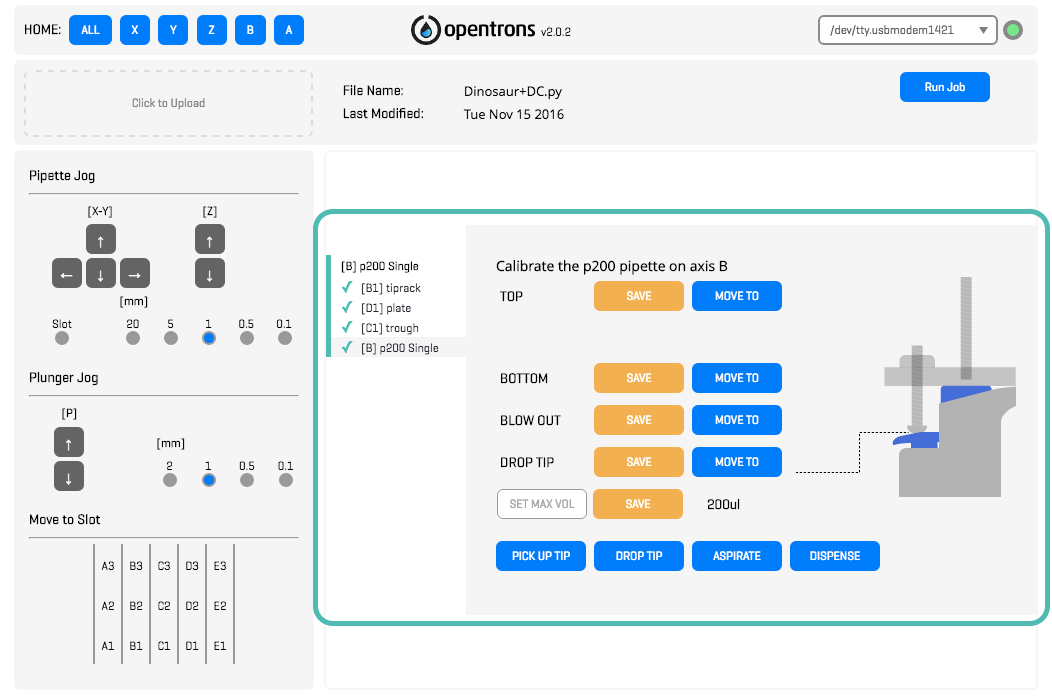
Once these positions are all saved, you can test your calibrations. This is most easily done gravimetrically using a small scale. Use the aspirate and dispense buttons to pick up liquid and eject it onto the scale. If this volume isn’t exactly what you expect, maybe 203 uL instead of 200, no big deal! You can go input the value into the max volume box. The robot will adjust its calculations accordingly and will then be able to dispense the correct volumes during experiments.
The drop tip screw may need to be adjusted up or down if you cannot accurately calibrate Bottom.
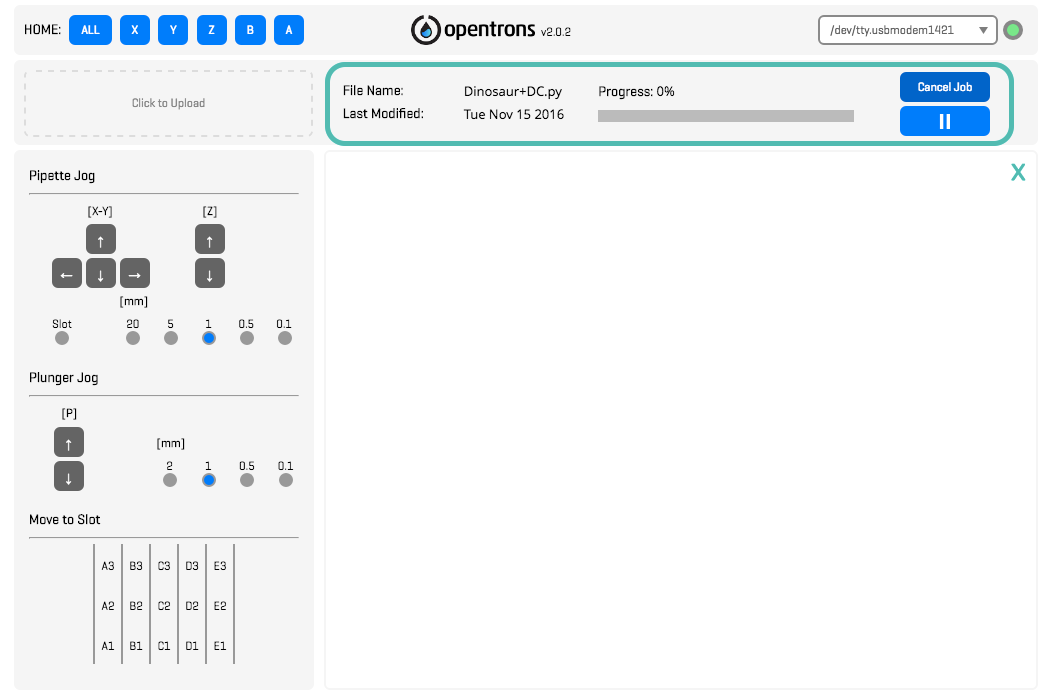
Run Protocol
Once all your positions are saved, you can run your protocol. A progress will keep track of what percentage of your protocol has been done. Protocols can be paused, or they can be stopped entirely. We recommend homing after all protocols have been completed or stopped.